Sunday, August 28, 2011

My Days of Scandal

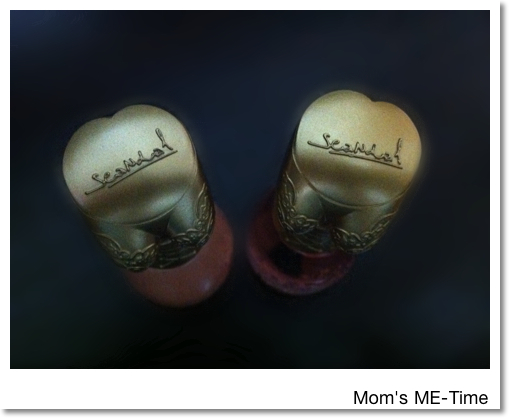
I would like to share with you my scandal experience.  Introducing the scandal base coat and top coat I purchased at Sasa Store.  The scandal comes in a sexy bottle :)  Actually, I have no intention of buying this product since I haven't heard of it.  But the saleslady were convincing, effective sales talk :p 


As far as I remember, this is my first purchase of base coat.  I can't even remember if I use a base coat either before as personal use.  Few months ago - before I bought my OPI shatter collection, I just finished tossing out my few years old nail polish.  Since I'm collecting a new batch of nail polish, I decided to add base coat to my collection.  I'm not particular on base coat since I never experienced discoloration on my my nails and I  usually do pedicure more than manicure.  And even without base coat on pedi, it will take a few weeks to chip. 

I will go straight ahead on my verdict if it helps to last my nail polish -  On my first try, a small chip appeared on day-9, just on one fingernail.  I remember, I applied paper thin of base coat.  Applied color polish as thin as possible, twice.  Then applied thick top coat, also applied top coat every other day.


Then one time, I forgot to apply base coat only the top coat, the usual it chip on the second day.  Other experienced that I had when I applied a thick layer of base coat, my color nail polish application was not easy, not smooth and my nail polish didn't last.  Other times, I applied my color nail polish not as thin as possible - it only last for four days.  So it all depends on how I applied my base coat and color nail polish.  Apply as thin as possible on base and color nail polish are very important.  Other factor that will keep my nail polish last for days, I will share it soon.  For the top coat, I like the shine it gives to my nails especially when I do it every other day, it always feels new.  This product is recommendable, just be careful on your base and color application. 

I also bought other brand of base coat and top coat.  I've read good reviews about Mavala.  I will try this soon and will give you my feedback. 


Photobucket

Thursday, August 25, 2011

My Make-up Brushes & Cleaning tips

Okay I'm here for my make-up brushes.  As you can see, they're from e.l.f. again (but not all).  Yeah, I'm really really loving elf!! Just so you know, I've started to collect make-up brushes only this year - same time that I've been collecting make-up and majority of them are from you know where!  During my younger years, when it comes to make-up - I'm only addicted to lipstick.  Yeah lipstick and love to collect different shades.  In addition to my make-up history, I only buy pressed powder and only last years that I've started using BB cream (as introduced by my friend).  Also, I only buy mascara, one set of eyeshadow, and a blush.  Like for my blusher, I usually buy blush with blush brush - it was just that simple.  Believe me, that's all I have before.  So only this year when I've learned about elf products which are known to be cheap but quality products.  Geez, I just can't stop wanting more elf!!

To date, these are all my brushes.  I'm planning to purchase brushes for the eyeshadow soon :D. Well,  I have the following:

  1. E.l.f. Studio Powder Brush #84003 - I use it for my e.l.f. HD powder

  2. E.l.f. Studio Complexion Brush #84002 - I use it for my blush;

  3. E.l.f. Studio Angled Foundation Brush #84005 - I sometimes use it for my BB cream;

  4. E.l.f. Studio Kabuki Face Brush #85011 - I use it for my e.l.f. mineral foundation;

  5. E.l.f. Studio Angled Eyeliner Brush #84013 - I use it for my e.l.f. cream eyeliner;

  6. E.l.f. Studio Stipple Brush #8401 - at the moment, I try to use for my e.l.f. bronzer :D

  7. E.l.f. Bronzing Brush #1805 - I seldom use it for my e.l.f. bronzer; and

  8. non elf products like etude and generic useful brushes :P

My favorite brushes?  All Studio brushes are amazing and  I love using them especially the kabuki brush!  If you want to try elf brushes...buy from their studio line, really works best!  Sad, I'm not happy with their elf bronzing brush - the brush hair sheds everywhere and can hardly pick-up a product.  I hope they come up with a good one.  I believe that's their old line of make-up brushes and maybe its time to face out those old ones.

Here's more on elf studio brushes:


I also have their elf brush shampoo and also a good product.  Actually, this is not a must have to clean your brushes and just continue using what you have.  But I would also like to have their elf daily brush cleaner :) ...already in my cart and hope to have it soon :P  


Brush Shampoo Directions:  Cleanse brush regularly by massaging a small amount of the shampoo with water and working it through the bristles from the base of the brush, outward.  Rinse thoroughly and gently squeeze out excess water.  Reshape the bristles and lay flat on a clean cloth to fully dry before next use.  

So just a quick note:  Just don't forget to first wash your make-up brush before use to remove whatever harmful chemicals.  And clean them at least once every two weeks.  And here's a video on how to clean make-up brushes:


Photobucket

Tuesday, August 23, 2011

E.l.f. Wet Gloss Lash & Brow Clear Mascara


I both used the wet gloss/clear mascara for my eyelash and eyebrow.  For the lash, I use it as a primer then I apply a regular waterproof mascara.  For the brow, I use it to set my brow and makeup in place (when I use brow/eyeshadow powder).  That way, it locks the brow makeup and stays longer.  In addition about the lash,  I noticed that my waterproof mascara doesn't break after long hours.  One time, when we went to the pool and I still had my make-up on - my eyebrow and eyelash both with elf wet gloss lash & brow clear mascara, I showered my face and wet my face many times at the pool without rubbing it and it stayed on and both didn't break.  I was surprised and even love the product even more.  The only downside is the bristle on the brow side - it is big.  Like if I put back the bristle the gel comes out.  That's the only problem I encountered. 

Monday, August 15, 2011

Her Hermit Crab

Hermit crab was my daughter's birthday wish this year.  Initially, we bought two crab for her. After a few days, we bought three cos the first one died.  To date, they are still well and alive. In fact, we have three active hermits while the other one - the old one is the lazy hermit :d 

The first image, was our first initial set up of their cage. By the way, we used our old fish tank, then other hermit accessories and substrates are all new.


The hermit on the plastic tree is the lazy one while the one in front of the cage died. The next photo, the hermit went out of his/her shell then after few hours died.  Learn on hermit crab out of shell and won't go back in.


The following photos are the additional three hermits and new set up of cage. This time, we used sand as their bedding, and it is easier for us to maintain.


We were able to video the hermit crab transferring to other shell, watch the two parts.


Photobucket

Monday, August 8, 2011

OPI Shatter

Hello!! I got so overly excited to add OPI Shatter to my nail polish collection. I bought them at Far East Plaza, prices varies depends on the store. The prices ranges from $18 to $20 each and other offer it at 2x for $32. My shades are silver, red, white, black and navy. I missed Torquiose which I'm not sure if I buy it in the future, as I already spent a lot of money. Then after buying them, I just learned about That Beauty Shop which they sell at a very low price compare to malls. Dang! I should have saved money!!


These are my first try. I applied thick shatter on my nails cos I know it dries fast and I wanted to cover all my base color in 3 parts so I put thick shatter on the brush.   Based on the images, maybe some of you might not like how it cracked and for sure it's because of the thick layer I applied. I thought it was nice but finally realized that it looks awful!


For the next photo, this time I applied thin layer. Can you tell the difference? 


And these are my favorite shade - navy (as per image, I still applied thick coat on navy)  and silver (thin coat). How 'bout you, what's your favorite OPI shatter? 


Make sure that your base color is really really dry. By the way when I used OPI shatter, I apply quick dry nail polish but I still see to it that its very dry, so I don't want to wait too long. Then apply thin coat as recommended only once for a good shatter effect. I've read that others were having a problem opening the bottle after using the first time and other said they can't use it anymore like after a month because it all dried up. But I didn't have any problem mentioned. Well just see to it that you remove the excess polish at the top of the bottle when you're done and of course close the bottle properly.  And work on the shatter as fast as you can to avoid drying up around top of the bottle.  That way you won't encounter any problem. 


Photobucket

Saturday, August 6, 2011

Blog on the go


I have 2 blogger apps - BlogPress and BloggerPlus.  They are both mobile blogging apps, where you can compose blog anywhere.  I first bought the BlogPress but contrary to others feedback, I wasn't happy with it.  I don't like the quality of the image when I check my post done with the app in PC - the quality is poor.  Then I found the BloggerPlus, I was really satisfied with the features and I've used this to all my posts since all my images were all iPhone shots.  It doesn't crash and posting is fast.  Most importantly, I like the settings / options under image, just refer to the screenshots as this apps can do anything.

Photobucket

Friday, August 5, 2011

Macaroon Workshop

I attended a macaroon workshop with friends few months ago, the usual this post is long overdue.  The fee was quite cheap so we grabbed the deal.  The workshop was time constraint and was held only in open space inside the mall.  I know making macaroons is difficult and needs ample time in preps so the workshop only covers on how to make the filling and decorating the macaroons.  We all enjoyed decorating the macaroons.   She gave us the detailed/complete recipe of macaroons and filling.  I haven't tried her recipe yet.  I don't know haven't bake for months.  


Photobucket